Several ways to draw individual pixels on a GBA
If you need your Game Boy Advance game to draw lines, rectangles, etc, there's a few ways to go about it. Each has their pros and cons, and some are truly mind bending. This post will go through a few, from simplest to most challenging.
Using a bitmap background
The GBA has various background modes, and a few of them turn the background into a bitmap surface you can easily draw into. For this post we will stick with mode 3, but modes 4 and 5 also enable bitmap graphics. In mode 3 the entire background converts into a 240x160, 15 bit bitmap. In other words, the entire screen becomes one image that is made up of direct color entries instead of using palettes.
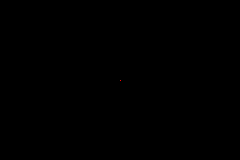
With that in mind, let's draw our first pixel.
#include REG_DISPCNT = DCNT_MODE3 | DCNT_BG2 ;
*(vid_mem while // keep the demo running forever }
return This is about as simple as it gets. In mode 3, each pixel on the screen is individually addressable, and each pixel address in vram stores a 15 bit color.
First we switch the GBA to mode 3 by setting the REG_DISPCNT (display controller) register. At the same time we are also turning on background 2, which is the bitmap background in this mode.
vid_mem is the starting address for video ram, so in mode 3 it is the very first pixel on the screen in the upper left corner. By adding 19200 to that address, we arrive at the halfway point, which would put us on the very center of the left edge of the screen. By adding 120 more on top of that, we arrive at the very center of the screen. We then set the color 0x1f to that address, which is pure red.
Drawing a line
To draw a line, a loop can be used to set a bunch of pixels.
#include REG_DISPCNT = DCNT_MODE3 | DCNT_BG2 ;
for i = i < *(vid_mem i ) }
while // keep the demo running forever }
return 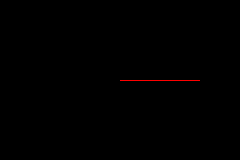
Since we can set any pixel on the screen we want, we are only limited by our imagination and coding skills on what we can draw.
Using Tonc's m3 functions
Tonc has done some of this work for us. The libtonc library contains functions like m3_rect and m3_line that can be used to draw basic shapes to the screen.
#include REG_DISPCNT = DCNT_MODE3 | DCNT_BG2 ;
// fill the entire screen with yellow m3_fill(CLR_YELLOW);
// draw a red filled rectangle m3_rect(10, CLR_RED );
// draw a blue outlined rectangle m3_frame(100, CLR_BLUE );
// draw an orange line m3_line(20, CLR_ORANGE );
// draw a single green dot m3_plot(200, CLR_GREEN );
while // keep the demo running forever }
return 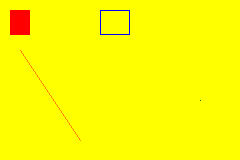
Tonc has defined various color constants, like CLR_ORANGE, for convenience. You can see the whole list here.
Drawing on sprites
Bitmap backgrounds are the easiest way to draw pixels. From here on out it's bit trickier, as instead of a bitmap surface we need to work with tiles, which are more complex.
Sprite crash course
Sprites on the GBA are made out of graphical tiles and a palette. After loading the tile and palette data into video ram, they can be tied to a sprite by setting its attributes in the object attribute memory.
Here is that in action in the most simplest way.
#include u8 faceTiles [32] 0x00, 0x10, 0x10, 0x10, u16 facePalette [5] 0x7c1f, // switch to mode 0 and enable sprites (aka objects) REG_DISPCNT = DCNT_MODE0 | DCNT_OBJ | DCNT_OBJ_1D ;
// copy the palette in memcpy16(pal_obj_mem, facePalette , // copy the tile in memcpy32(&tile_mem[4][0], faceTiles , // establish the sprite obj_set_attr(oam_mem, ATTR0_SQUARE , ATTR1_SIZE_8x8 , while // keep the demo running forever }
return In this simple example, we loaded sprite data that we already had on hand. I took a png image of the purple face and ran it through a gba graphics converter to get the tile and palette data.
Often tiles are considered "static". Things like animation and changing scenery usually involves changing which tiles we are using. But tiles are written into video ram, and video ram can be changed at any time. So they actually aren't static at all, and that is how we accomplish drawing pixels directly onto sprites.
Drawing on tiles
So instead of copying pre determined tile data, we will write values into the tile memory to accomplish our drawing. At its core, it's very similar to how bitmap mode works. But tiles introduce a few gotchas and complexities.
Tile data contains two pixels per byte
Take our face sprite as an example.
It is an 8x8 image, so it converts into a single GBA tile. Each pixel in the image is assigned a number that corresponds to where that color is found in the palette, so it becomes something like this.
But since GBA palettes are only 16 colors, you can actually squeeze two pixel palette indexes into one byte. So the actual tile data becomes this.
We are interested in setting a single pixel's value at a time. So with tiles, we will be forced to deal with half bytes. But it gets even worse. On the GBA, writes to video ram must happen in two byte chunks. That means when we want to change a single pixel's value, we will have no choice but to deal with 4 pixels.
Setting a single pixel
With that in mind, let's write code that will change a single pixel of a sprite. We will take our face sprite and change one of its eyes from white to black.
/* ** tile and palette data left off, ** same as previous example */
int REG_DISPCNT = DCNT_MODE0 | DCNT_OBJ | DCNT_OBJ_1D ;
// copy the palette in memcpy16(pal_obj_mem, facePalette , // copy the tile in memcpy32(&tile_mem[4][0], faceTiles , // establish the sprite obj_set_attr(oam_mem, ATTR0_SQUARE , ATTR1_SIZE_8x8 , // now, change the eye pixel
u16 *tile u16 *fourPixels tile + *fourPixels while // keep the demo running forever }
return What in the heck is going on here? This ridiculous code is precisely changing the tile such that the left eye's palette index is now 4 (black).
Our face sprite is using the very first sprite tile in video ram. For reasons I'm going to ignore, tile_mem[4][0] is the address of that tile. Since video ram needs to be written 2 bytes at a time, we cast this memory address to a u16*, as that makes our life easier.
tile is currently pointing at the very start of the tile, but our pixel is found deeper in. Since tile data is two pixels crammed into a single byte, and we must deal with double bytes, we are working with 4 pixel chunks at a time. The eye pixel we want to change is in the fifth chunk, so we need to jump forward four chunks.
That is what this line is doing.
u16* fourPixels = tile + It uses pointer arithmetic to jump forward four half words (which are u16s) to point at the chunk we care about.
Now that we are pointing at the data we want to change, we can finally change it.
*fourPixels In this chunk, we want the third pixel (the eye) to go from palette index 2 (white) to 4 (black). Which is what this line is doing, it is slamming a 4 into that pixel, and leaving the other three pixels alone.
Abstracting this into a function
That's a lot of work and a lot of things to remember just to change a single pixel! We can make our life a little easier by hiding all of the details in a function.
void u32 x , u32 y , u32 value ) u16 *fourPixels tile + y * x / u16 valueToSet = value << *fourPixels valueToSet ;}
int REG_DISPCNT = DCNT_MODE0 | DCNT_OBJ | DCNT_OBJ_1D ;
// copy the palette in memcpy16(pal_obj_mem, facePalette , // copy the tile in memcpy32(&tile_mem[4][0], faceTiles , // establish the sprite obj_set_attr(oam_mem, ATTR0_SQUARE , ATTR1_SIZE_8x8 , // now, change the other eye pixel u16 *tile u32 x = u32 y = u32 paletteIndex = setPixel(tile, x , y , paletteIndex );
while // keep the demo running forever }
return With our new setPixel, we are using it to set the other eye to black.
That's great, it's now super simple to set a single pixel within a sprite's tile. From there, full on drawing of lines, boxes (and even circles if you're feeling adventurous) is now doable.
For sure, setPixel is not an easy function to reason about. I tend to just liberally comment it and move on :)
void u32 x , u32 y , u32 value ) u16 *fourPixels tile + y * x / u16 valueToSet = value << *fourPixels valueToSet ;}To start the function accepts the pointer in video ram to the start of the tile. We need to move forward within the tile based on the x and y coordinate we were given. We are still dealing with 4 pixel chunks, and since tiles are always 8x8, a single row of tile data is made up of two chunks. So we move forward within the tile by y*2, to arrive at the start of the row we are interested in. From there, we need to grab either the first or second chunk of that row depending on what x is. Dividing x by four allows us to accomplish that.
We now have the chunk we need to change, but which pixel in the chunk will get the new value? That depends on x again. By using x % 4, we can get the pixel's location within the chunk. We then take that position and multiply it by 4, to arrive at how many bits we need to move up in order to set our value.
Even with that description this function is a 3 three line beast. That's just the reality of dealing with tiles at this level on the GBA.
Working with multi tile sprites
Our face sprite is only a single tile, making drawing on it a bit easier. Most sprites are bigger than that. What if we had a sprite that was 4 tiles wide?
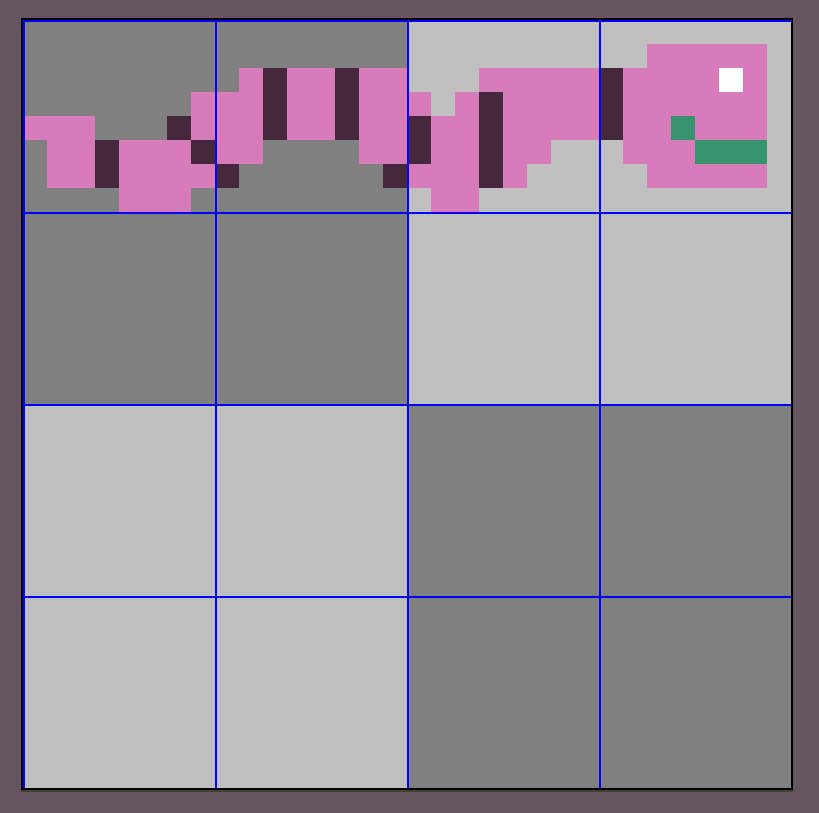
This time we are working with a sprite that is 4 tiles wide. It is also 4 tiles tall because GBA sprites can only be certain sizes, and 4x4 is one of them. We will ignore all the extra blank tiles and just think of this as a 4x1 sprite.
And here it is on the GBA's screen.

Let's again change the eye to black. This is very similar to before, but now the eye is in the fourth tile over. We need to change setPixel to be aware that sprites can be multiple tiles wide (and tall).
void u32 x , u32 y , u32 value ) u32 tileYIndex = y / u32 tileXIndex = x / u16 *tile startingTile + tileXIndex ) u16 *fourPixels tile + u16 valueToSet = value << *fourPixels valueToSet ;}
int ... u16 *startingTile u32 x = u32 y = u32 paletteIndex = setPixel(startingTile, x , y , colorIndex ); ...}The function is given startingTile, which is the very first tile of the sprite, just like before. We need to jump ahead to the tile that contains the x and y coordinate we are interested in. If we divide those coordinates by 8, we will get x and y tile indexes. In our example we passed in x=29 and y=2, which maps to tile indexes x=3 and y=0. Which makes sense, if you look above at the worm sprite, its eye is in tile 3 (the first tile is tile zero).
With the indexes in hand, we can jump forward in memory and point at the tile we care about.
u16 *tile startingTile + tileXIndex ) Notice we are multiplying y by 4? That is because this sprite is 4 tiles wide. So this function as it is written will only work correctly on sprites that are 4 tiles wide. A simple fix is to pass the width of the sprite we are working with into the function as a parameter. We multiply the whole shebang by 16 because each tile is 16 half words (a u16).
Once we are pointed at the correct tile, the rest of the function is the same as before, with one minor tweak. When we were dealing with a single tile, we knew x and y would always be less than 8. Here the x that was passed in is 29. We need to map that 29 that is the coordinate of the pixel across the entire sprite to the coordinate of the pixel within our current tile. Modding the x value by 8 accomplishes that, and same with the y value.
Hoo! We made it, we can now draw onto sprites. I am glossing over some details here and there, but the core idea is there. Now let's move onto the real prize, tiled background drawing...
Drawing on tiled backgrounds
Drawing on sprites is useful, but often the real prize is arbitrary drawing on tiled backgrounds. Why? Why not just use a bitmap background like at the start of the post? When you switch the GBA to bitmap mode, you only get a single background. In tiled mode, there are four backgrounds to work with. If you need to do drawing but still need to have some regular backgrounds for your game, your only choice is sticking with tiled backgrounds.
Tiled background crash course
Tiled backgrounds are similar to sprites. They use the same tile data to form their image. Where they differ from sprites is they also use a tile map. Let's take a look at Super Mario Bros for a second.
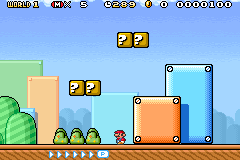
This scene is made of several backgrounds, and the main terrain background uses tiles multiple times.

If a sprite uses the same tile more than once, that tile gets copied into vram multiple times, which is wasteful. For backgrounds, there is only one copy of a tile, and then a map tells the GBA how to lay the tiles out to form a background.
In the Mario example, the bushes might have a tile id of 1. So in the map, there will be three 1's.

Just like a tile is made up of numbers that tell the pixel what color in the palette it is, tile maps are numbers that tell what tile goes onto that part of the background.
Drawing on a background
Drawing into a tiled background is very similar to how we drew on sprites, but we must deal with the tile map. Here is a little demo that draws a diagonal line in the upper left corner of the screen.
#include u16 bgPalette [5] u32 x , u32 y , u32 value ) u32 tileYIndex = y / u32 tileXIndex = x / u16 *tile startingTile + tileXIndex ) u16 *fourPixels tile + u16 valueToSet = value << *fourPixels valueToSet ;}
#define REG_DISPCNT = DCNT_MODE0 | DCNT_BG0 ; REG_BG0CNT = BG_REG_32x32 ;
memcpy16(pal_bg_mem, bgPalette , u16 *bgMap se_mem [SBB];
u32 tileMapIndex = for y = y < for x = x < bgMap [y x ] tileMapIndex ++; } }
u16 *tile for i = i < setPixel(tile, i , i , }
while // keep the demo running forever }
return 
If you look at the code, it's very similar to the sprite drawing code. Except it's doing something with CBB and SBB? This is because before we can draw on a background, we need to set up the tile map.
#define REG_DISPCNT = DCNT_MODE0 | DCNT_BG0 ; REG_BG0CNT = BG_REG_32x32 ;First we tell the GBA to use mode 0 (ie, four regular tiled backgrounds) and enable background zero, the one we are going to draw into. Then the next line is telling the GBA how background zero should be set up (BG0CNT means "background 0 control"). Background zero will find its tile data at character base block 0, and its tile map at screen base block 4. This sounds confusing, but we are really just dedicating certain sections of video ram to the background's tiles and its tile map, and telling the GBA where so it knows how to find everything it needs in order to draw the background onto the screen.
memcpy16(pal_bg_mem, bgPalette , Then we copy our palette into background palette ram, so we can have some colors to work with. This is just like sprite palettes, except background palettes go to a different spot (pal_obj_mem for sprites, and pal_bg_mem for backgrounds).
u16 *bgMap se_mem [SBB];
u32 tileMapIndex = for y = y < for x = x < bgMap [y x ] tileMapIndex ++; } }And here is the real magic that differentiates this from sprite drawing. We are setting up a tiny little tile map in the upper left corner of the screen.
First we get a pointer to our tile map. This is just a location in video ram where we will write our map.
Then we write the numbers 1 through 4 into the map, corresponding to the corner. That is what the two for loops are doing. When they finish, the tile map for our background will look like this.

By setting up 1-4 in the upper corner like this, that means tiles 1 through 4 can be used to draw on. The rest of the tile map is set to zero, and we will leave tile zero blank so that the rest of the screen remains empty.
u16 *tile for i = i < setPixel(tile, i , i , }So now that we have our tile map set up, we can grab tiles and draw on them, just like before. Here the starting tile pointer is set to tile_mem[CBB][1]. That's just a fancy way of grabbing exactly the part of vram we care about, the [1] is because we want to start at tile 1, and leave tile 0 alone so it remains blank.
From here, setPixel is exactly the same as it was in the sprite version. Once we have a tile map set up and some background tiles to draw into, the actual drawing of the pixels is identical to drawing on sprites.
Tiled background drawing limitations
Notice when we set up the tile map, each entry had a different number. That is different from Super Mario Bros which used the same 1 repeatedly to drop 3 bushes into the scene. We need each entry in the tile map to be different, so that each tile can individually be drawn and be different.
There's only so much video ram, and only so many tiles we get to work with. Typically when drawing on a background like this, you will need to confine the drawing to a small portion of the screen. If you try to draw an image onto the entire screen, you will use up almost all of the tiles available and have virtually nothing else left for your game. If you need to do that, bitmap modes are more efficient.
Conclusion
Hoo! This was a whopper of a post. And I even flubbed some details to try and keep it a little shorter.
Why go through all of this trouble? If your GBA game needs to draw something, why not just use bitmap mode? I'm currently making a nonogram game (aka picross) for the GBA and I needed to draw into sprites in order for my game to have a font. This allows me to show the player the name of the puzzle they just solved when they beat it. I used the sprite drawing technique described here along with a bitmap font I devised. By using sprite drawing techniques instead of just using a font that is based on tiles, it allows variable width letters. For example the letter 'i' is much narrower than the letter 'm'. By drawing the text in this way, I can account for that. If I used tiles, the i's would have a ton of space around them.
And then there is the main puzzle board. Implementing it was much easier using functions like drawRectangle() and drawLine() instead of trying to wrangle sprites where they need to be. For the board I could have used bitmap mode (and I did this when I was first starting the game). But I ultimately wanted access to all four backgrounds for better visuals in the game, and so that meant I needed to draw the board onto a tiled background. To do that, I use the third technique outlined in this post.
Truthfully I mostly wrote this post for myself. This is some very obtuse programming, and having a post like this I can refer back to allows me to not forget any details.